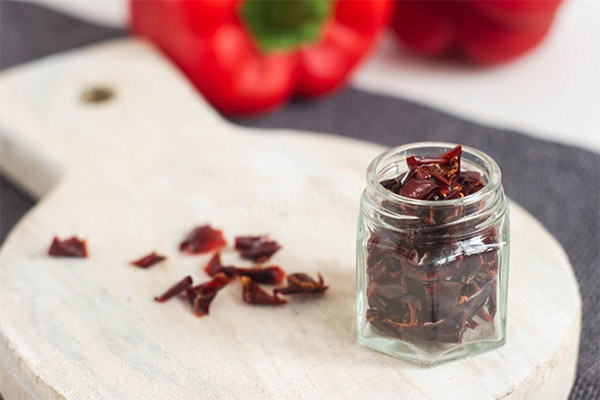
How to properly dry bell peppers
The process of drying vegetables is used for centuries, but in spite of this, still loses out to "canned" canning. And in vain! Drying has some distinct advantages: no need to stand for hours at the stove, sterilizing jars and boiling vegetables. Dried foods take up less shelf space, they weigh less. Compared with boiling, less useful substances are lost in the process of drying. The bright aroma and flavor remain, and in some cases they are even more pronounced. And lastly, if the process is done correctly, the dried product lasts even longer than canned food. It's tempting, right?
- How to choose bell peppers for drying
- How to prepare the vegetable for drying
- How to dry bell peppers at home
- In the oven
- In an electric dryer
- In a microwave oven
- Air grill
- Dehydrator
- In the sun
- "Air rope drying without slicing
- How to find out when the product is ready
- How to properly store dried bell peppers
- What are the benefits of dried bell peppers
- What can be made of dried bell peppers
- Bread with dried peppers and ham
- Creamy soup with chicken and paprika
- Enchilada sauce
- Bacon and Sweet Pepper Biscuits
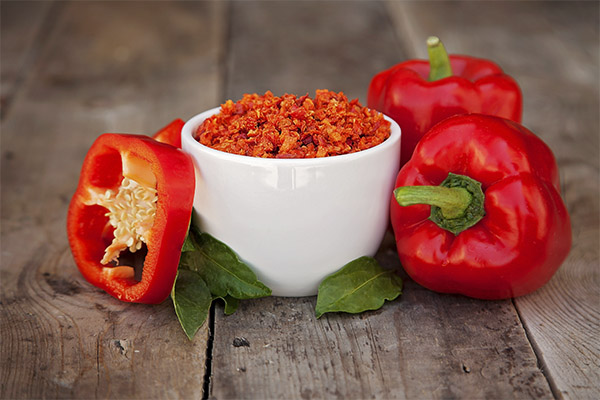
Bright, sweet and juicy bell peppers can also be subjected to drying. Cut into strips or ground into a powder - in any form it will add a special note to any dish, because peppers are one of those vegetables, which after drying only intensifies the flavor-aromatic properties. Compare it to pickled - the sweetness of dried seasoning is much better than vinegar, which interrupts the true taste of the vegetable.
How to choose bell peppers for drying
To ensure that dried peppers do not disappoint and leave only pleasant impressions, you should approach the selection and preparation with full responsibility. The vegetables should be fully ripe, without damage and signs of spoilage. And it seems to be all clear, but now we will learn some tricks and tricks, how to determine yet in the store, which peppers you should give preference, which will minimize the losses in preparation.
Pay attention to the tail of the pepper - a healthy vegetable will have a dense and green color, to create the feeling that it is about to be cut from the bush. A dried out dark brown tail indicates an old bell bell pepper.
Examine the vegetable for dark spots, similar to sores, and bloated skin - this is due to the beginning of the rotting process, the emergence of fungus. Small yellow and orange dots are also the result of negative effects, but in this case the cause is gnats.
Bell peppers are also divided by gender differences. Simply put, there are boys and there are girls. The first have only three sections, they have an elongated shape, the second have four sections, and the shapes are more rounded. It's just like in life, isn't it? The female type has a sweet flavor and a soft texture. Despite the obvious plus in organoleptic properties, such peppers will have to dry longer because of the wateriness. And if you value your time, give preference to the male type - they are dense, less watery and excellent not only for drying, but also for any other heat treatment (especially for homemade vegetable stew).
And finally, choose peppers of different colors! After all, it will be great to diversify the dish with bright summer colors in the cold gray winter.
How to prepare the vegetable for drying
After making a quality selection of bell peppers, wash each vegetable in warm running water and dry them with a paper towel. Dry the peppers usually in thin strips (about 6-7 mm wide and 3 cm long). But this is not fundamental, just decide for yourself in advance where you will use it in the dried form in the future. If the peppers are waiting for further grinding into powder - the shape is not important. After removing the core and seeds, the inedible hard tail, cut the peppers into pieces and then into small pieces. By the way, it is especially convenient to remove the core of peppers with a special peeler. The process speeds up many times, allowing you to peel a large number of peppers in a short time.
If you could not find peppers without defects, or due to inattention got a "hired Cock", do not get upset - remove the bad places with a knife.
A small trick before drying is to sprinkle peppers with a small amount of salt - they will dry faster. You can also add the usual spices - Italian or French herbs, if desired.
How to dry bell peppers at home
So, we have prepared the peppers, cut them into slices/slices/cubes, now it's time to decide how and where to dry them. There are several options, but not everyone may be suitable due to lack of special devices, for example, or even because of bad weather. Choose your own from the suggested ways to dry vegetables below.
In the oven
Not the fastest method, but the advantage is that almost every housewife has an oven. But it is not without disadvantages - the oven and peppers in it will require close attention. The pieces will have to be periodically turned, otherwise instead of dried, we will get an ordinary roasted vegetable.
Before you start drying, preheat the oven to a temperature of 75 degrees Celsius. If it supports convection mode - use this mode to help. This way we'll evaporate more moisture and get an even, dry crust.
The best drying will be the method that provides the least contact of the product with other surfaces - so we get an even drying of "all sides". If there is a grid or mesh at home, be sure to use it. And to prevent moisture from dripping and dripping in the oven on the bottom, place a tray under the grid. But what to do if the pieces are so small that they fall off the rack down? First, don't despair. And secondly, bravely put the peppers on a baking tray lined with baking paper (it will help us keep the tray clean).
This is the end of drying preparations, everything is ready. We put our tray with peppers in the oven. It will stay there for about 6 hours. Twice an hour it is necessary to watch how the process goes. Especially it is convenient to do it when the door of the oven is not completely closed. Be sure to leave a little distance (taking the example of an open window on the ventilation mode). This way extra steam escapes better, and the temperature in the oven remains constant.
Once the peppers reach the desired dry consistency and 3 hours of time have passed, leave them for a couple more hours at room temperature. As it cools, the moisture in the vegetables evens out and the pieces become denser.
Remember that it is not necessary to limit yourself to one tray. There may be more, it all depends on the capabilities and capacity of your oven. Just don't forget to swap them out in the process for even drying.
In an electric dryer
The drying process in an electric dryer is very similar to the above described in the oven. But the use of an electric dryer is convenient in that you do not have to keep a constant check on the state of the peppers - the machine will do everything on its own.
Lay the sliced bell peppers on each level of the dryer in a single layer (it is important that the pieces do not touch each other, and if possible the distance between them was 1 cm), glossy side down. Many people advise turning on the electric dryer to the maximum temperature level and it is usually 80-90 degrees Celsius, but to preserve the nutritional value, use a temperature of 50 degrees. Yes, the drying time will undoubtedly double, but it is much better to get a product full of vitamins and trace elements than a "lifeless breadcrumb".
The average drying time will be 12 hours, but it may increase due to several factors: the power of the dryer, the thickness of the slices and the juiciness of the selected peppers. The result should be shriveled, brittle and almost weightless pieces of paprika. Losses during such heat treatment amount to 90-95%, i.e. from 1 kg of fresh bell peppers you will get 50-60 g of dried paprika.
In the microwave
The method is fast and good if you need to prepare a small amount for soup or bread with paprika. The maximum amount that can be used if properly processed is 2-3 pieces of peppers.
Drying can be done in two modes - defrosting and microwave (the simplest microwaves are just these functions).
Microwave mode: spread the slices of pepper on a plate in a single layer and make sure that the strips touched each other to a minimum. Optimal power for quick drying is 200-300 watts - at these parameters it will be possible to dry peppers in 3 minutes. After the microwave will let you know with a beep that the process is finished, open the door of the equipment and check the paprika by stirring - it should not be moistened. Repeat the procedure, if the vegetable was not dried to the end.
It is quite possible that the selected power is simply not suitable for your equipment - this will be clear from the appearance in the process of the smell of burnt product. This does not mean that the idea with drying should be abandoned and forget about it - it is enough to reduce the power indicator and continue drying already at the new modes. Time, of course, will also increase, but insignificantly - only 2 times.
Many inexperienced people defrosting chicken or fish in the "Defrost" mode, and setting the wrong time, brought the meat to almost boiled state. And this microwave's ability to cook even what we don't need will play to our advantage.
The method of laying out the peppers is the same - on a glass plate with a visible distance of each piece from each other. We set the desired mode and roll the peppers in the microwave for 10 minutes. Remove excess evaporation and moisture by opening the equipment door every 3 minutes. If 10 minutes is not enough - increase time until peppers turn into brittle weightless slices.
In an air grill
The work of the air grill is based on the thermal treatment of food with the help of hot air streams. In other words, it's that convection we need, which cuts the drying time in half, compared to the oven. Vegetables are placed on a special grid, which is a direct part of the air grill, and dried under the influence of hot air coming out of the burners. Thoroughly washed and towel-dried peppers are placed on a rack in a single layer, after which the burner is turned on medium power. Dry the vegetable for 4 hours, until it reaches the desired brittleness. If we reduce the processing time, we get dried peppers, which, by the way, also keeps longer than fresh ones.
In a dehydrator.
This specially designed for drying apparatus is necessary, rather, for the industrial scale. But especially responsible housewives can buy such a unit and home, the more so that the manufacturers of dehydrators have taken care of us and created small compact models. The dehydrator is equipped with fans and a heat source. Their work can be compared to the action of a hair dryer - warm air circulates around the body, evenly drying the contents. The work of such devices is quiet, and especially convenient models are equipped with a timer, so that at the end of the process the device will turn off by itself.
Place the sliced bell peppers on the racks that are inserted into the dehydrator. To ensure good air circulation, do not forget about the personal space of each piece. Adjust the temperature to about 60°C and set the timer for 8-12 hours (depending on the thickness of the slices). After this time, make sure that the slices have dried sufficiently.
In the sun
This is the slowest way, which was used even by our patient grandmothers and great-grandmothers. Drying peppers in the fresh air and in favorable weather conditions (which is 30 degrees Celsius or higher), we need 5 days. If the temperature is lower, the process can take up to 10 days, perhaps even longer. That is why this method should be chosen deliberately and you should check the weather forecast for the next week in advance.
We put the peppers on a tray or tray and put it in a darkened and well ventilated place. This can be a balcony or the attic of the house, a window ledge, if its width allows you to put a pallet on it and ensure a stable position. Every day we turn and stir the paprika, exposing each side and side of the pepper to the sun. If the forecast showed that rain or high humidity is expected during the day, we move the tray with the vegetable indoors, otherwise it will get damp and become unfit for further use.
Another disadvantage of drying in the sun, in addition to the amount of time spent, is the attack of peppers by various microbes (for example, through small gnats, which love to inhabit the fragrant and unprotected products). Therefore, after air-drying the peppers, be sure to disinfect them with high temperatures. We heat the oven to 100 degrees Celsius, place the dried peppers in it and turn off the equipment. In these conditions we keep the paprika until it cools completely.
"Rope Drying" in the air without slicing
When we visited our grandmother in the village, we could see long beads of dried mushrooms, apples, and hot peppers. The same can be done with sweet bell peppers: take a needle with a wide eye, put it through a strong thread of the right length and string the peppers on the tail, gradually moving to the end of the thread. In winter we fix the rope near the radiator, and in summer - "dress up" the beads on the balcony.
To ensure that the peppers do not touch each other and dry evenly on all sides, fasten their location on the string with knots - so they will not slip, and ventilation will be provided on all sides.
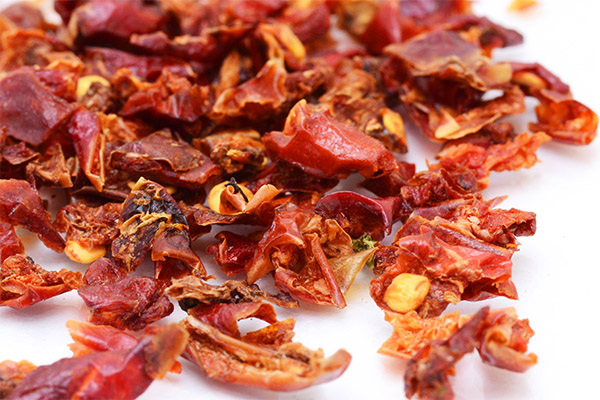
How to readiness
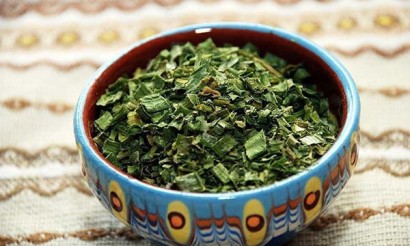
It is impossible to determine the exact time for drying, so the readiness of the product is determined visually and to the touch. Pepper slices should be wrinkled, dense, easily broken and crunchy on the teeth when eating. If they bend like a sun-dried tomato, then the peppers are not fully dried. It is necessary to repeat the process to achieve the desired result.
How to properly store dried bell peppers
"Grandma's" proven way of storing dried herbs, vegetables and fruits is a linen pouch, which increases the preservation for a long time. The fact is that the peculiarity of the weaving of such a bag (namely, the presence in it of small holes, like a grid), provides constant ventilation. Dried bell peppers in such conditions will not acquire an unpleasant musty smell and taste.
You should not consider a glass container for storing pieces of pepper, unless you are able to provide a constant temperature and humidity. Typically, storage takes place in the kitchen, where the steaming-roasting process is constant, the temperature is constantly changing, and the humidity soars upward now and then. These are not the best conditions for dried foods, which like low humidity and moderate temperature. In a glass bottle at one point there will be condensation, affecting not only the consistency of the vegetable, but also the appearance of unfavorable microflora.
Not ideal, but the most suitable would be a polyethylene bag. For the same stable air circulation, small holes are made in it and stored in a hanging state.
What is the use of dried bell peppers?
As already mentioned, the dried products retain vitamins and microelements, we can consider their usefulness on a par with the fresh ones. So, what can dried bell peppers boast of?
- The bright vegetable contains a high level of minerals, the basis of which is iron, manganese, potassium, selenium and magnesium. Each of them has a positive effect on the body, improving the functioning of all systems - from head to toe.
- Peppers are rich in vitamins. The first place of honor goes to vitamin C (especially if the green or red variety was used for drying) - a powerful antioxidant our body needs for the synthesis of collagen, which in turn maintains the integrity of blood vessels, increases skin elasticity (ladies, remember), improves the body's resistance to infections.
- Red peppers, compared to the others, contain high amounts of vitamin A and B. So use them more than the others. Vitamin B promotes the production of melatonin, which the body needs to regulate its internal clock, helps with insomnia and promotes healthy sleep.
- Carotenoids help fight free radicals that we acquire from environmental toxins and can lead to cancer. Yellow and orange peppers are particularly rich in them.
- One handful of chopped fresh peppers contains up to 40 calories, and dried peppers even less. And if you decide to watch your figure, the vegetable is perfect for snacking.
- Bell peppers have anti-inflammatory properties. By reducing inflammation in the arteries, it helps prevent cardiovascular disease and diabetes.
- An appetizer of dried sweet peppers is suitable for people with high cholesterol levels, because it contains the alkaloid capsaicin, which reduces the amount of this substance.
What to make with dried bell peppers
Sweet dried peppers make a great addition to a variety of dishes. If they have been dried correctly, you can store them for months at a time, delighting all the family with bright vegetables even in winter. After all, even in dried form, bell peppers are added to the first dish, salads and lecho. Or you can just chew them as a crunchy snack with some sauce - such chips will be much healthier than the purchased ones.

In addition, such dried peppers can be ground into a seasoning and forget about buying sweet ground paprika in stores.
Let's look at a few recipes for foods and dishes using dried peppers.
Bread with dried peppers and ham
The recipe for this savory, easy bread comes to us from southern France. And is it strange why French women are so thin, despite their excess of floury foods?
Ingredients for the filling:
- 600 g of dried colorful bell peppers.
- 1 onion.
- 1 garlic clove.
- 200g of smoked bacon.
Ingredients for the dough:
- 4 eggs.
- 250g flour.
- 1 package (10 g) of baking powder.
- 3 tablespoons olive oil.
- 50 ml of milk.
- Salt and pepper to taste.
You also need seasoning "French Herbs".
Instructions for the preparation of the stuffing:
- Heat olive oil (2 tablespoons) in a pan and then add finely chopped garlic and onion. When golden crust appears, add bacon chopped in small cubes / strips and dried peppers (the latter will be soaked in olive oil and soften a little in the process of frying).
- Roast the stuffing for 15 minutes and at the end add salt, pepper and French herbs.
- Place the stuffing on a plate and cover it with a paper towel so that it absorbs the excess oil.
Instructions for making the dough:
- In the beaten 4 eggs add the flour and yeast and mix thoroughly until evenly consistency. There should be no lumps.
- Then pour milk and 1 tablespoon of olive oil into the container with the resulting mass (if you did not remove the remaining oil from the filling, you do not need to add oil to the dough).
- Mix again until a homogeneous dough without lumps is obtained. The dough should turn out liquid.
Instructions for making bread:
- Add the pepper and bacon filling to the dough and mix very gently. If desired, add olives - this will only improve the taste of the bread, it will be impossible to tear away from it.
- Grease the bread form with oil and sprinkle a little flour on the walls and the bottom of the form. Pour the ready batter into the mould and place the future hearty cake in an oven preheated to 180°C.
- Bake the bread for about 40 minutes at 180°C. Check the readiness with the help of a knife - put its tip into the bread and almost immediately take it out, it should come out dry. The same operation can be done with a toothpick.
Creamy soup with chicken and paprika
Tender, light and summery soup is worth making in winter to cheer up the whole family.
Ingredients for the soup:
- 90 g of butter.
- 1 head of onion.
- 1 stick of celery.
- 1 small carrot.
- 2 tablespoons dried sweet paprika.
- 40 grams of wheat flour.
- 2 liters of chicken broth.
- 125 ml cream.
- 300g chicken breasts.
Instructions for cooking the soup:
- In a frying pan with a deep bottom, melt the butter over medium heat and add to it the previously finely chopped onion, celery and carrots. Braise the vegetables until they have softened (on average, this takes 10 minutes).
- Add dried paprika to the pan and braise the contents for another 2 minutes, until fragrant. Add the wheat flour and immediately stir until the flour has dissolved. Cook for another minute and remove from the heat.
- In a saucepan pour one third of the broth of the amount specified in the ingredients and add to it the resulting thick paste. Stir well, so that there are no lumps.
- Put the pot on fire and pour the rest of the chicken broth. We stir until the soup comes to a boil and thickens. Decrease the fire, cover and stew for half an hour.
- Add cream and pieces of cooked chicken and take the soup off the heat. Season to taste and serve with crusty bread (or you can also use the one we made in the first recipe).
Enchilada sauce
Traditionally, this sauce is made with hot chili peppers. But what if you don't like spicy foods and you really want to try Mexican food? You won't be able to make it without some twisting of the recipe, but it's definitely worth a try. After all, reassure yourself that both sweet paprika and chili are peppers after all, and therefore interchangeable (yes, yes, fool your brain).
Ingredients:
- 1/4 cup vegetable oil.
- 2 tablespoons flour.
- 1/4 cup dried red paprika (finely chopped).
- 250g tomato paste.
- 350 ml cup water.
- 1/4 teaspoon garlic powder.
- 1/4 teaspoon onion powder.
- Salt to taste.
Instructions for making the sauce:
- Heat oil in a frying pan over medium heat, then add flour and paprika. Boil the contents on low heat until a slightly browned color (provided you used red paprika, otherwise the color will be different), stirring constantly so as not to burn the flour.
- Mix tomato paste with water and gradually start adding it to the contents of the pan. After seasoning with salt and spices (by the way, garlic and onion can also be dried at home on their own and use them at any opportunity).
- We continue to boil the sauce on low heat for 10 minutes (the sauce during this time should thicken).
Serve it warm. Buen provecho! (Bon appetit!)
Bacon and pepperoni cookies
Ingredients:
- 2 slices of bacon.
- 4 tablespoons crushed dry bell peppers.
- 2 cups wheat flour.
- Half cup butter or margarine.
- 1 egg.
- 3 tablespoons cream (high fat).
- 1 pinch of ground black pepper.
- 1 egg yolk.
Instructions for making the cookies:
- Fry the sliced bacon in a frying pan over medium heat until crispy, then remove any excess fat with a paper towel and cool completely.
- In a large bowl, stir together the flour, oil/margarine, egg, salt and heavy cream. You can use a mixer to speed up the process. Mix until you get a homogeneous thick structure without lumps.
- Subsequently, knead the dough with your hands until it stops sticking to your hands. In the process, gradually add small portions of cooled bacon and pepper slices.
- Roll the dough into a "log" about 4-5 cm in diameter, then wrap in foil or baking paper and place in the fridge for 2 hours. The dough will become denser, and it will be much more convenient to cut circles for cookies. You can skip this point if you prefer to shape the cookies yourself.
- Preheat the oven to 180 degrees Celsius.
- Take the dough out of the fridge, remove the paper/foil and begin to cut into circles, which we place on a greased baking sheet. Grease each circle with whipped egg yolk.
- Bake the cookies for 15-20 minutes until they are brown. The consistency should turn out dense, baked crumbly.
«Important: All information on this site is provided for informational purposes only purposes only. Before using any of the recommendations, please consult a health care professional. specialist before using certain recommendations. Neither the editors nor the authors shall be liable for any possible harm caused by materials."